
LM35 Temperature Sensor Arduino — Wiring, Code & Proteus
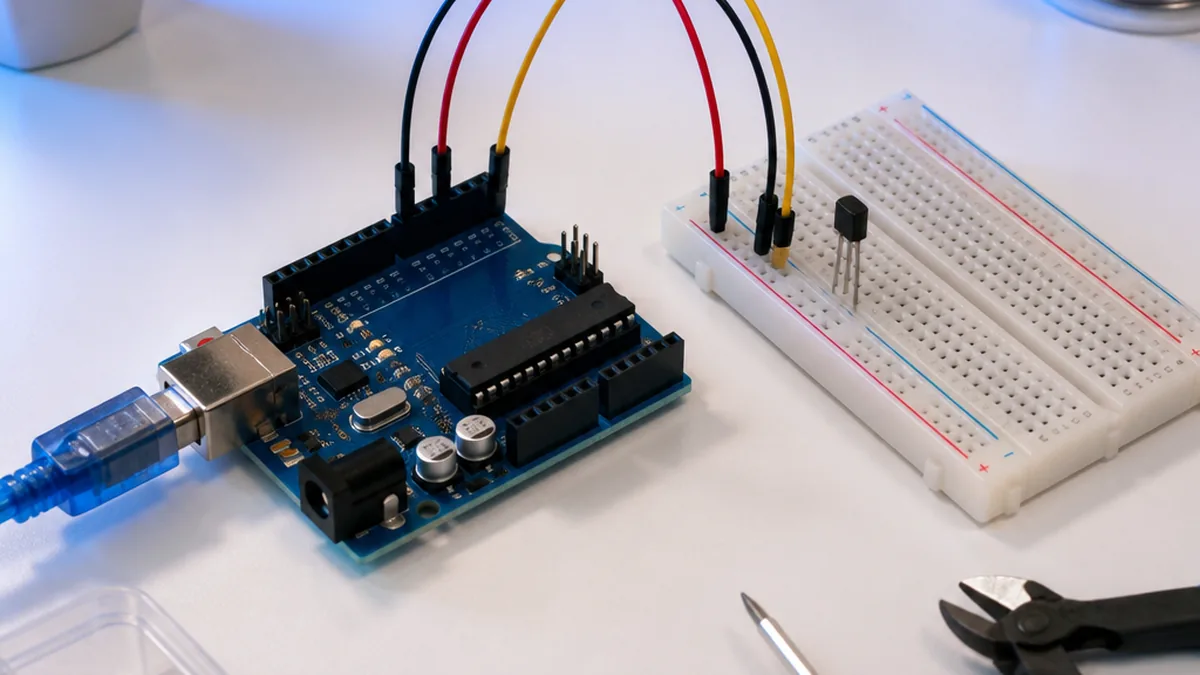
The LM35 Temperature Sensor Arduino combo is the classic first analog project: three pins, one wire to A0, and you're reading temperature in °C. This tutorial covers the LM35 pinout, the correct ADC-to-°C formula, wiring for Arduino Uno, and a working Proteus simulation you can open before you touch hardware.
Welcome to this beginner-friendly Arduino tutorial on the lm35 temperature. By the end of the guide, you'll wire the module to an Arduino UNO, flash a short sketch, and read live values on the Serial Monitor — no prior electronics experience required.
Need this built for you? I do custom Arduino, ESP32 and Proteus projects from $15.
What you'll learn
- How the module works in plain language
- The exact parts you need and how to wire them safely
- The full Arduino IDE sketch with comments
- Common issues and how to fix them
 — overview](/uploads/arduino/interfacing-lm35-temperature-sensor-with-arduino/cover.png)
Arduino code
Open the Arduino IDE, paste the sketch below into a new file, install any libraries the sketch #includes (Tools → Manage Libraries), select your board and COM port, then click Upload.
// LM35 is connected to this PIN
#define sensorPin A0

void setup() {
  // Init serial at 9600 baud
  Serial.begin(9600);
}

void loop() {
  //Read Raw ADC Data
  int adcData = analogRead(sensorPin);

  // Convert that ADC Data into voltage
  float voltage = adcData * (5.0 / 1024.0);

  // Convert the voltage into temperature
  float temperature = voltage * 100;

  // Print the temperature data
  Serial.print("Temperature: ");
  Serial.print(temperature);
  Serial.println("*C");


  delay(800); // wait a second between readings
}
How it works
The sketch initialises serial communication and the lm35 temperature driver in setup(), then in loop() it samples the sensor at a regular interval and prints the result to the Serial Monitor at 9600 baud. Open the Serial Monitor (Ctrl+Shift+M) after upload to see live readings.
Troubleshooting checklist
- No readings: verify the baud rate in Serial Monitor matches the sketch (usually 9600).
- Garbage characters: wrong baud rate or loose GND wire.
- Library not found: install the exact library referenced in the
#includeline via Library Manager. - Sensor not detected (I²C): run an I²C scanner sketch to confirm the address.
What to build next
Once the basic readout works, try logging values to an SD card, sending them over Wi-Fi with an ESP32, or pushing them to a Blynk IoT dashboard. Pair this module with our simulator round-up to prototype the circuit before soldering.
Stuck on your own build? Send me your Arduino / ESP32 / Proteus project on Fiverr — from $15, you don't pay if it doesn't work.
Frequently Asked Questions
Q.How does the LM35 temperature sensor work?
The LM35 is a linear analog sensor that outputs 10 mV per °C. At 25 °C it produces 250 mV, which the Arduino ADC reads on an analog pin and converts into a temperature reading.
Q.What is the LM35 Arduino code formula?
Read the analog pin, then convert: temperatureC = (analogRead(A0) * 5.0 / 1023.0) * 100. The *100 turns the 10 mV/°C output into whole degrees Celsius.
Q.Why does my LM35 show wrong values in Proteus?
In Proteus the LM35 model needs the correct AREF/VCC voltage (5.0 V) and its OUT pin must go to an Arduino analog pin, not digital. A noisy simulated 5V rail also produces spikes — set VCC to a clean 5V source.
Q.LM35 vs DHT11 — which should I use?
The LM35 is analog, faster and more accurate for temperature alone. DHT11 is digital and adds humidity but is slower and less precise. Use LM35 when you only need temperature.
The Engineer Post
Embedded systems engineer and educator. Writes weekly tutorials at EmbedLab to help beginners ship real hardware.
Related projects
 — Arduino UNO tutorial cover image](/uploads/arduino-covers/interfacing-dht11-sensor-with-arduino.webp)
Interfacing DHT11 Humidity & Temperature Sensor with Arduino
Step-by-step Arduino tutorial: wire the dht11 to an Arduino UNO, upload the example sketch, and read live values on the Serial Monitor.
 — Arduino UNO tutorial cover image](/uploads/arduino-covers/ds18b20-temperature-sensor-with-arduino.webp)
How Does a DS18b20 Temperature Sensor Work and how to Interface it with Arduino
Step-by-step Arduino tutorial: wire the ds18b20 temperature to an Arduino UNO, upload the example sketch, and read live values on the Serial Monitor.
Water Level Sensor with Arduino
Step-by-step Arduino tutorial: wire the water level to an Arduino UNO, upload the example sketch, and read live values on the Serial Monitor.
Rain Detection Sensor with Arduino
Step-by-step Arduino tutorial: wire the rain detection to an Arduino UNO, upload the example sketch, and read live values on the Serial Monitor.
Pulse Sensor with Arduino
Step-by-step Arduino tutorial: wire the pulse to an Arduino UNO, upload the example sketch, and read live values on the Serial Monitor.