
Interfacing BMP280 Sensor with Arduino
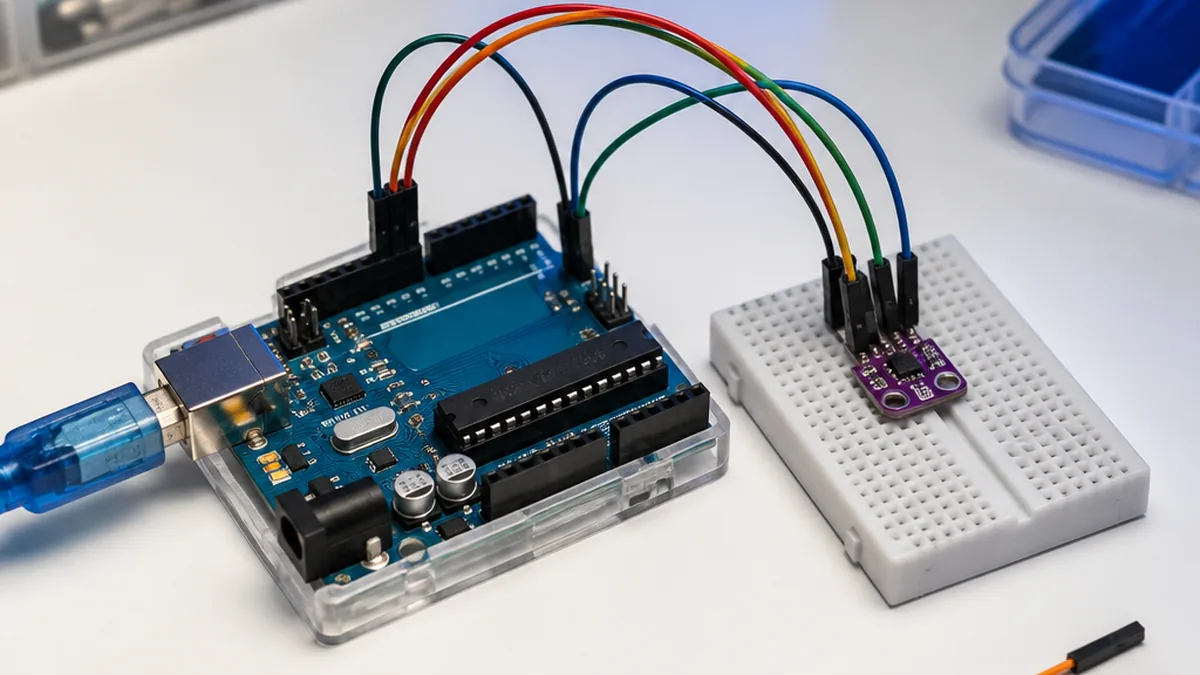
Welcome to this beginner-friendly Arduino tutorial on the bmp280 pressure. By the end of the guide, you'll wire the module to an Arduino UNO, flash a short sketch, and read live values on the Serial Monitor — no prior electronics experience required.
What you'll learn
- How the module works in plain language
- The exact parts you need and how to wire them safely
- The full Arduino IDE sketch with comments
- Common issues and how to fix them
Hardware you'll need
| Component | Qty | Notes |
|---|---|---|
| Arduino UNO | 1 | Microcontroller board for interfacing. |
| BMP280 Sensor Module | 1 | Barometric pressure and temperature sensor. |
| Breadboard | 1 | For prototyping connections. |
| Jumper Wires | As req. | For making connections between Arduino and BMP280 module. |
| USB Cable | 1 | For powering and programming the Arduino. |
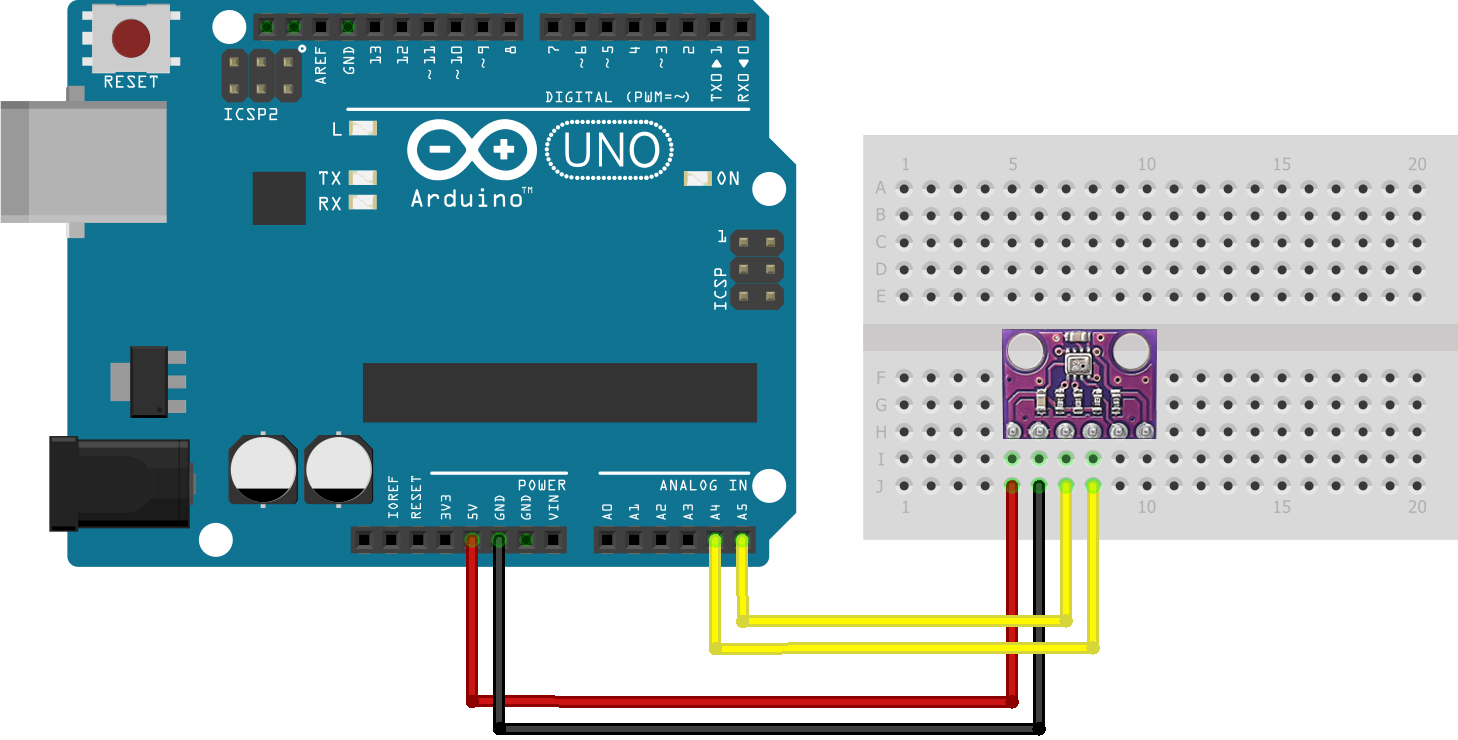
Wiring & pin mapping
| Module Pin | Arduino Pin |
|---|---|
| VCC | 3.3V / 5V |
| GND | GND |
| SCL | A5 (SCL) |
| SDA | A4 (SDA) |
| CSB | Not Connected |
| SDO | Not Connected |
Arduino code
Open the Arduino IDE, paste the sketch below into a new file, install any libraries the sketch #includes (Tools → Manage Libraries), select your board and COM port, then click Upload.
/***************************************************************************
  This is a library for the BMP280 humidity, temperature & pressure sensor

  Designed specifically to work with the Adafruit BMP280 Breakout
  ----> http://www.adafruit.com/products/2651

  These sensors use I2C or SPI to communicate, 2 or 4 pins are required
  to interface.

  Adafruit invests time and resources providing this open source code,
  please support Adafruit andopen-source hardware by purchasing products
  from Adafruit!

  Written by Limor Fried & Kevin Townsend for Adafruit Industries.
  BSD license, all text above must be included in any redistribution
 ***************************************************************************/

#include <Wire.h>
#include <SPI.h>
#include <Adafruit_BMP280.h>

#define BMP280_ADDRESS 0x76
Adafruit_BMP280 bmp; // I2C


void setup() {
  Serial.begin(9600);
  while ( !Serial ) delay(100);   // wait for native usb
  Serial.println(F("BMP280 test"));
  unsigned status;
  status = bmp.begin(BMP280_ADDRESS);
  if (!status) {
    Serial.println(F("Could not find a valid BMP280 sensor, check wiring or "
                      "try a different address!"));
    Serial.print("SensorID was: 0x"); Serial.println(bmp.sensorID(),16);
    Serial.print("        ID of 0xFF probably means a bad address, a BMP 180 or BMP 085\n");
    Serial.print("   ID of 0x56-0x58 represents a BMP 280,\n");
    Serial.print("        ID of 0x60 represents a BME 280.\n");
    Serial.print("        ID of 0x61 represents a BME 680.\n");
    while (1) delay(10);
  }

  /* Default settings from datasheet. */
  bmp.setSampling(Adafruit_BMP280::MODE_NORMAL,     /* Operating Mode. */
                  Adafruit_BMP280::SAMPLING_X2,     /* Temp. oversampling */
                  Adafruit_BMP280::SAMPLING_X16,    /* Pressure oversampling */
                  Adafruit_BMP280::FILTER_X16,      /* Filtering. */
                  Adafruit_BMP280::STANDBY_MS_500); /* Standby time. */
}

void loop() {
    Serial.print(F("Temperature = "));
    Serial.print(bmp.readTemperature());
    Serial.println(" *C");

    Serial.print(F("Pressure = "));
    Serial.print(bmp.readPressure());
    Serial.println(" Pa");

    Serial.print(F("Approx altitude = "));
    Serial.print(bmp.readAltitude(1013.25)); /* Adjusted to local forecast! */
    Serial.println(" m");

    Serial.println();
    delay(2000);
}
How it works
The sketch initialises serial communication and the bmp280 pressure driver in setup(), then in loop() it samples the sensor at a regular interval and prints the result to the Serial Monitor at 9600 baud. Open the Serial Monitor (Ctrl+Shift+M) after upload to see live readings.
Project ideas & applications
- DIY weather stations
- Altitude measurement in drones
- Indoor environmental monitoring
- Pressure-based navigation systems
Troubleshooting checklist
- No readings: verify the baud rate in Serial Monitor matches the sketch (usually 9600).
- Garbage characters: wrong baud rate or loose GND wire.
- Library not found: install the exact library referenced in the
#includeline via Library Manager. - Sensor not detected (I²C): run an I²C scanner sketch to confirm the address.
What to build next
Once the basic readout works, try logging values to an SD card, sending them over Wi-Fi with an ESP32, or pushing them to a Blynk IoT dashboard. Pair this module with our simulator round-up to prototype the circuit before soldering.
Frequently Asked Questions
Q.What library do I need for the bmp280 pressure?
Open Arduino IDE → Tools → Manage Libraries, then search for any library named in the sketch's #include lines and install the latest version.
Q.Why does the Serial Monitor show nothing?
The most common cause is a baud-rate mismatch — set the Serial Monitor to 9600 baud (bottom-right dropdown) so it matches Serial.begin(9600) in the code.
Q.Can I use this with an ESP32 instead of Arduino UNO?
Yes. The bmp280 pressure works with any 3.3-5 V microcontroller. Just remap the wiring to ESP32 I/O pins and keep the rest of the sketch the same.
The Engineer Post
Embedded systems engineer and educator. Writes weekly tutorials at EmbedLab to help beginners ship real hardware.
Related projects
 — Arduino UNO tutorial cover image](/uploads/arduino-covers/interfacing-the-sr04t-sr04m-waterproof-ultrasonic-sensor-with-arduino.webp)
Interfacing SR04T/SR04M Waterproof UltraSonic Sensor with Arduino Uno
Step-by-step Arduino tutorial: wire the the sr04t, sr04m waterproof ultrasonic to an Arduino UNO, upload the example sketch, and read live values on the Serial Monitor.
 — Arduino UNO tutorial cover image](/uploads/arduino-covers/interfacing-tsl25911-ambient-light-sensor-with-arduino.webp)
Interfacing TSL25911 Ambient Light Sensor with Arduino
Step-by-step Arduino tutorial: wire the tsl25911 ambient light to an Arduino UNO, upload the example sketch, and read live values on the Serial Monitor.
 — Arduino UNO tutorial cover image](/uploads/arduino-covers/interfacing-ir-sensor-module-with-arduino.webp)
Interfacing IR Sensor Module with Arduino
Step-by-step Arduino tutorial: wire the ir to an Arduino UNO, upload the example sketch, and read live values on the Serial Monitor.
 — Arduino UNO tutorial cover image](/uploads/arduino-covers/interfacing-hall-effect-sensor-with-arduino.webp)
Interfacing Hall Effect Sensor With Arduino
Step-by-step Arduino tutorial: wire the hall effect to an Arduino UNO, upload the example sketch, and read live values on the Serial Monitor.
 — Arduino UNO tutorial cover image](/uploads/arduino-covers/interfacing-flame-sensor-with-arduino.webp)
Interfacing Flame Sensor with Arduino
Step-by-step Arduino tutorial: wire the flame to an Arduino UNO, upload the example sketch, and read live values on the Serial Monitor.