
LoRa SX1276 and DHT22 interface with Arduino
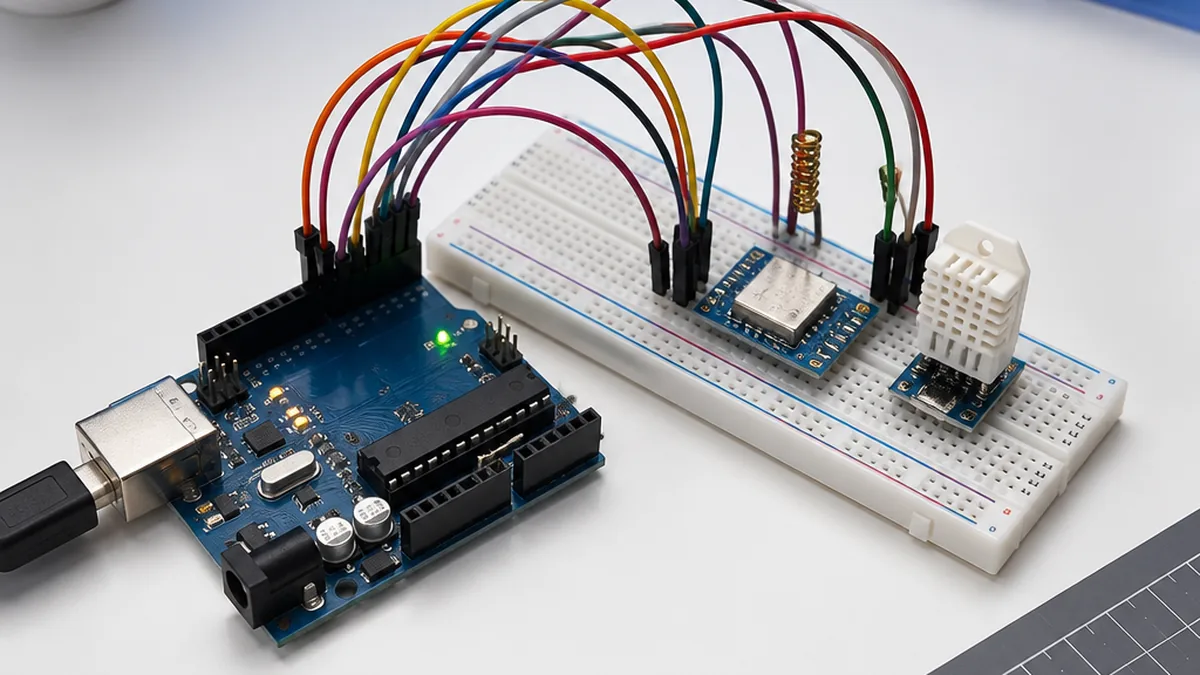
Welcome to this beginner-friendly Arduino tutorial on the lora sx1276 and dht22 interface. By the end of the guide, you'll wire the module to an Arduino UNO, flash a short sketch, and read live values on the Serial Monitor — no prior electronics experience required.
What you'll learn
- How the module works in plain language
- The exact parts you need and how to wire them safely
- The full Arduino IDE sketch with comments
- Common issues and how to fix them
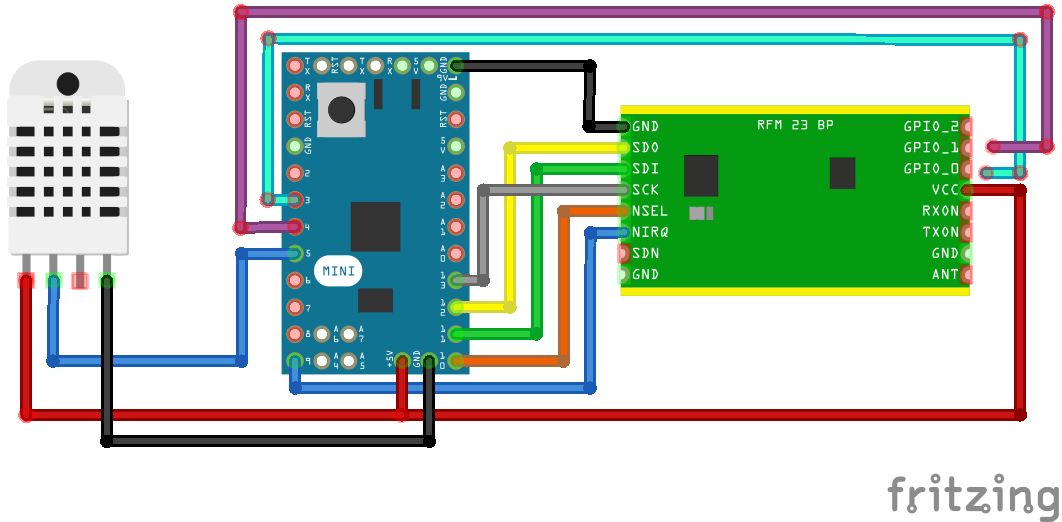
Arduino code
Open the Arduino IDE, paste the sketch below into a new file, install any libraries the sketch #includes (Tools → Manage Libraries), select your board and COM port, then click Upload.
/*******************************************************************************
 * The Things Network - Sensor Data Example
 *
 * Example of sending a valid LoRaWAN packet with DHT22 temperature and
 * humidity data to The Things Networ using a Feather M0 LoRa.
 *
 * Learn Guide: https://learn.adafruit.com/the-things-network-for-feather
 *
 * Copyright (c) 2015 Thomas Telkamp and Matthijs Kooijman
 * Copyright (c) 2018 Terry Moore, MCCI
 * Copyright (c) 2018 Brent Rubell, Adafruit Industries
 *
 * Permission is hereby granted, free of charge, to anyone
 * obtaining a copy of this document and accompanying files,
 * to do whatever they want with them without any restriction,
 * including, but not limited to, copying, modification and redistribution.
 * NO WARRANTY OF ANY KIND IS PROVIDED.
 *******************************************************************************/
#include <lmic.h>
#include <hal/hal.h>
#include <SPI.h>

// include the DHT22 Sensor Library
#include "DHT.h"

// DHT digital pin and sensor type
#define DHTPIN 5
#define DHTTYPE DHT22

//
// For normal use, we require that you edit the sketch to replace FILLMEIN
// with values assigned by the TTN console. However, for regression tests,
// we want to be able to compile these scripts. The regression tests define
// COMPILE_REGRESSION_TEST, and in that case we define FILLMEIN to a non-
// working but innocuous value.
//
#ifdef COMPILE_REGRESSION_TEST
#define FILLMEIN 0
#else
#warning "You must replace the values marked FILLMEIN with real values from the TTN control panel!"
#define FILLMEIN (#dont edit this, edit the lines that use FILLMEIN)
#endif


// This EUI must be in little-endian format, so least-significant-byte
// first. When copying an EUI from ttnctl output, this means to reverse
// the bytes. For TTN issued EUIs the last bytes should be 0xD5, 0xB3,
// 0x70.
static const u1_t PROGMEM APPEUI[8] = { 0x00, 0x00, 0x00, 0x00, 0x00, 0x00, 0x00, 0x00 };
void os_getArtEui (u1_t* buf) {
  memcpy_P(buf, APPEUI, 8);
}

// This should also be in little endian format, see above.
static const u1_t PROGMEM DEVEUI[8] = { 0xF5, 0x33, 0x05, 0xD0, 0x7E, 0xD5, 0xB3, 0x70 };
void os_getDevEui (u1_t* buf) {
  memcpy_P(buf, DEVEUI, 8);
}

// This key should be in big endian format (or, since it is not really a
// number but a block of memory, endianness does not really apply). In
// practice, a key taken from ttnctl can be copied as-is.
static const u1_t PROGMEM APPKEY[16] = { 0xB8, 0x2B, 0xEA, 0xC6, 0x49, 0x5A, 0xAC, 0xBC, 0x36, 0xAC, 0x22, 0x4A, 0xF2, 0x78, 0x33, 0x72 };
void os_getDevKey (u1_t* buf) {
  memcpy_P(buf, APPKEY, 16);
}

// payload to send to TTN gateway
static uint8_t payload[5];
static osjob_t sendjob;

// Schedule TX every this many seconds (might become longer due to duty
// cycle limitations).
const unsigned TX_INTERVAL = 30;

// Pin mapping for Adafruit Feather M0 LoRa
// /!\ By default Adafruit Feather M0's pin 6 and DIO1 are not connected.
// Please ensure they are connected.
const lmic_pinmap lmic_pins = {
  .nss = 9,
  .rxtx = LMIC_UNUSED_PIN,
  .rst = 10,
  .dio = {8, 7, LMIC_UNUSED_PIN},
};

// init. DHT
DHT dht(DHTPIN, DHTTYPE);

void printHex2(unsigned v) {
    v &= 0xff;
    if (v < 16)
        Serial.print('0');
    Serial.print(v, HEX);
}

void onEvent (ev_t ev) {
    Serial.print(os_getTime());
    Serial.print(": ");
    switch(ev) {
        case EV_SCAN_TIMEOUT:
            Serial.println(F("EV_SCAN_TIMEOUT"));
            break;
        case EV_BEACON_FOUND:
            Serial.println(F("EV_BEACON_FOUND"));
            break;
        case EV_BEACON_MISSED:
            Serial.println(F("EV_BEACON_MISSED"));
            break;
        case EV_BEACON_TRACKED:
            Serial.println(F("EV_BEACON_TRACKED"));
            break;
        case EV_JOINING:
            Serial.println(F("EV_JOINING"));
            break;
        case EV_JOINED:
            Serial.println(F("EV_JOINED"));
            {
              u4_t netid = 0;
              devaddr_t devaddr = 0;
              u1_t nwkKey[16];
              u1_t artKey[16];
              LMIC_getSessionKeys(&netid, &devaddr, nwkKey, artKey);
              Serial.print("netid: ");
              Serial.println(netid, DEC);
              Serial.print("devaddr: ");
              Serial.println(devaddr, HEX);
              Serial.print("AppSKey: ");
              for (size_t i=0; i<sizeof(artKey); ++i) {
                if (i != 0)
                  Serial.print("-");
                printHex2(artKey[i]);
              }
              Serial.println("");
              Serial.print("NwkSKey: ");
              for (size_t i=0; i<sizeof(nwkKey); ++i) {
                      if (i != 0)
                              Serial.print("-");
                      printHex2(nwkKey[i]);
              }
              Serial.println();
            }
            // Disable link check validation (automatically enabled
            // during join, but because slow data rates change max TX
      // size, we don't use it in this example.
            LMIC_setLinkCheckMode(0);
            break;
        /*
        || This event is defined but not used in the code. No
        || point in wasting codespace on it.
        ||
        || case EV_RFU1:
        ||     Serial.println(F("EV_RFU1"));
        ||     break;
        */
        case EV_JOIN_FAILED:
            Serial.println(F("EV_JOIN_FAILED"));
            break;
        case EV_REJOIN_FAILED:
            Serial.println(F("EV_REJOIN_FAILED"));
            break;
            break;
        case EV_TXCOMPLETE:
            Serial.println(F("EV_TXCOMPLETE (includes waiting for RX windows)"));
            if (LMIC.txrxFlags & TXRX_ACK)
              Serial.println(F("Received ack"));
            if (LMIC.dataLen) {
              Serial.println(F("Received "));
              Serial.println(LMIC.dataLen);
              Serial.println(F(" bytes of payload"));
            }
            // Schedule next transmission
            os_setTimedCallback(&sendjob, os_getTime()+sec2osticks(TX_INTERVAL), do_send);
            break;
        case EV_LOST_TSYNC:
            Serial.println(F("EV_LOST_TSYNC"));
            break;
        case EV_RESET:
            Serial.println(F("EV_RESET"));
            break;
        case EV_RXCOMPLETE:
            // data received in ping slot
            Serial.println(F("EV_RXCOMPLETE"));
            break;
        case EV_LINK_DEAD:
            Serial.println(F("EV_LINK_DEAD"));
            break;
        case EV_LINK_ALIVE:
            Serial.println(F("EV_LINK_ALIVE"));
            break;
        /*
        || This event is defined but not used in the code. No
        || point in wasting codespace on it.
        ||
        || case EV_SCAN_FOUND:
        ||    Serial.println(F("EV_SCAN_FOUND"));
        ||    break;
        */
        case EV_TXSTART:
            Serial.println(F("EV_TXSTART"));
            break;
        case EV_TXCANCELED:
            Serial.println(F("EV_TXCANCELED"));
            break;
        case EV_RXSTART:
            /* do not print anything -- it wrecks timing */
            break;
        case EV_JOIN_TXCOMPLETE:
            Serial.println(F("EV_JOIN_TXCOMPLETE: no JoinAccept"));
            break;

        default:
            Serial.print(F("Unknown event: "));
            Serial.println((unsigned) ev);
            break;
    }
}

void do_send(osjob_t* j){
    // Check if there is not a current TX/RX job running
    if (LMIC.opmode & OP_TXRXPEND) {
        Serial.println(F("OP_TXRXPEND, not sending"));
    } else {
        // read the temperature from the DHT22
        float temperature = dht.readTemperature();
        Serial.print("Temperature: "); Serial.print(temperature);
        Serial.println(" *C");
        // adjust for the f2sflt16 range (-1 to 1)
        temperature = temperature / 100;

        // read the humidity from the DHT22
        float rHumidity = dht.readHumidity();
        Serial.print("%RH ");
        Serial.println(rHumidity);
        // adjust for the f2sflt16 range (-1 to 1)
        rHumidity = rHumidity / 100;

        // float -> int
        // note: this uses the sflt16 datum (https://github.com/mcci-catena/arduino-lmic#sflt16)
        uint16_t payloadTemp = LMIC_f2sflt16(temperature);
        // int -> bytes
        byte tempLow = lowByte(payloadTemp);
        byte tempHigh = highByte(payloadTemp);
        // place the bytes into the payload
        payload[0] = tempLow;
        payload[1] = tempHigh;

        // float -> int
        uint16_t payloadHumid = LMIC_f2sflt16(rHumidity);
        // int -> bytes
        byte humidLow = lowByte(payloadHumid);
        byte humidHigh = highByte(payloadHumid);
        payload[2] = humidLow;
        payload[3] = humidHigh;

        // prepare upstream data transmission at the next possible time.
        // transmit on port 1 (the first parameter); you can use any value from 1 to 223 (others are reserved).
        // don't request an ack (the last parameter, if not zero, requests an ack from the network).
        // Remember, acks consume a lot of network resources; don't ask for an ack unless you really need it.
        LMIC_setTxData2(1, payload, sizeof(payload)-1, 0);
    }
    // Next TX is scheduled after TX_COMPLETE event.
}

void setup() {
    delay(5000);
    while (! Serial);
    Serial.begin(9600);
    Serial.println(F("Starting"));

    dht.begin();

    // LMIC init
    os_init();
    // Reset the MAC state. Session and pending data transfers will be discarded.
    LMIC_reset();
    // Disable link-check mode and ADR, because ADR tends to complicate testing.


    // Start job (sending automatically starts OTAA too)
    do_send(&sendjob);
}

void loop() {
  // we call the LMIC's runloop processor. This will cause things to happen based on events and time. One
  // of the things that will happen is callbacks for transmission complete or received messages. We also
  // use this loop to queue periodic data transmissions.  You can put other things here in the `loop()` routine,
  // but beware that LoRaWAN timing is pretty tight, so if you do more than a few milliseconds of work, you
  // will want to call `os_runloop_once()` every so often, to keep the radio running.
  os_runloop_once();
}
How it works
The sketch initialises serial communication and the lora sx1276 and dht22 interface driver in setup(), then in loop() it samples the sensor at a regular interval and prints the result to the Serial Monitor at 9600 baud. Open the Serial Monitor (Ctrl+Shift+M) after upload to see live readings.
Troubleshooting checklist
- No readings: verify the baud rate in Serial Monitor matches the sketch (usually 9600).
- Garbage characters: wrong baud rate or loose GND wire.
- Library not found: install the exact library referenced in the
#includeline via Library Manager. - Sensor not detected (I²C): run an I²C scanner sketch to confirm the address.
What to build next
Once the basic readout works, try logging values to an SD card, sending them over Wi-Fi with an ESP32, or pushing them to a Blynk IoT dashboard. Pair this module with our simulator round-up to prototype the circuit before soldering.
Frequently Asked Questions
Q.What library do I need for the lora sx1276 and dht22 interface?
Open Arduino IDE → Tools → Manage Libraries, then search for any library named in the sketch's #include lines and install the latest version.
Q.Why does the Serial Monitor show nothing?
The most common cause is a baud-rate mismatch — set the Serial Monitor to 9600 baud (bottom-right dropdown) so it matches Serial.begin(9600) in the code.
Q.Can I use this with an ESP32 instead of Arduino UNO?
Yes. The lora sx1276 and dht22 interface works with any 3.3-5 V microcontroller. Just remap the wiring to ESP32 I/O pins and keep the rest of the sketch the same.
The Engineer Post
Embedded systems engineer and educator. Writes weekly tutorials at EmbedLab to help beginners ship real hardware.
Related projects
 — Arduino UNO tutorial cover image](/uploads/arduino-covers/interfacing-lm35-temperature-sensor-with-arduino.webp)
How Does a LM35 Temperature Sensor Work and how to Interface it with Arduino
Step-by-step Arduino tutorial: wire the lm35 temperature to an Arduino UNO, upload the example sketch, and read live values on the Serial Monitor.
 — Arduino UNO tutorial cover image](/uploads/arduino-covers/ds18b20-temperature-sensor-with-arduino.webp)
How Does a DS18b20 Temperature Sensor Work and how to Interface it with Arduino
Step-by-step Arduino tutorial: wire the ds18b20 temperature to an Arduino UNO, upload the example sketch, and read live values on the Serial Monitor.
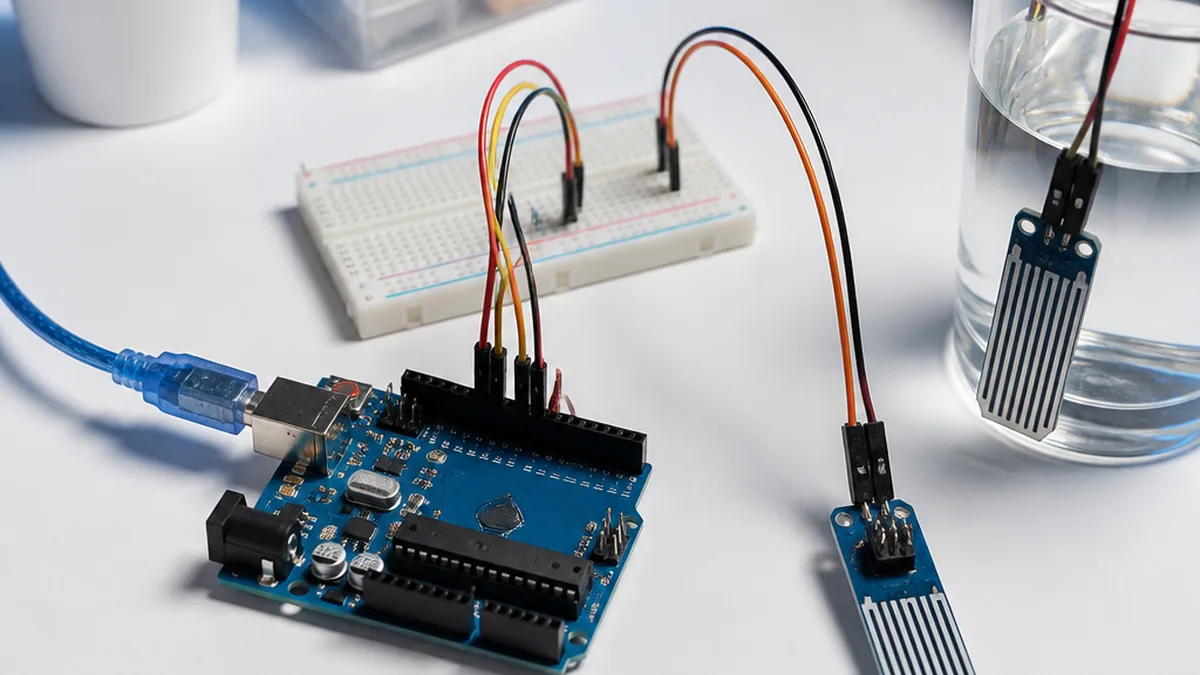
Water Level Sensor with Arduino
Step-by-step Arduino tutorial: wire the water level to an Arduino UNO, upload the example sketch, and read live values on the Serial Monitor.
 — Arduino UNO tutorial cover image](/uploads/arduino-covers/tcs3200-colour-sensor-with-arduino.webp)
Interfacing 16x2 LCD with Arduino
Step-by-step Arduino tutorial: wire the tcs3200 colour to an Arduino UNO, upload the example sketch, and read live values on the Serial Monitor.
 — Arduino UNO tutorial cover image](/uploads/arduino-covers/sound-sensor-with-arduino.webp)
Interfacing 16x2 LCD with Arduino
Step-by-step Arduino tutorial: wire the sound to an Arduino UNO, upload the example sketch, and read live values on the Serial Monitor.